When I started printing custom miniatures for my D&D campaign three years ago, I spent weeks researching the best 3d printers for tabletop game prop makers. I made costly mistakes. I bought an FDM printer first, thinking all 3D printers were the same, and ended up with layer lines so thick my goblins looked like they had skin conditions.
The truth is, choosing the right 3D printer for tabletop gaming depends entirely on what you want to create. For detailed character miniatures and 28mm scale figures, you need a resin printer with high XY resolution. For terrain pieces, dungeon tiles, and larger props, an FDM printer offers speed and build volume at a lower cost.
Our team tested 8 of the most popular printers specifically for tabletop gaming use in 2026. We printed D&D monsters, Warhammer-style wargaming units, dungeon tiles, and scatter terrain. We measured layer resolution, timed print speeds, tested build plate adhesion, and evaluated post-processing workflows. This guide covers 4 resin printers and 4 FDM printers across every budget range, from $189 entry-level machines to professional-grade options.
Table of Contents
Top 3 Picks for Best 3D Printers for Tabletop Game Prop Makers in 2026
After hundreds of test prints and months of real-world use, these three printers stood out for different use cases. Whether you want the absolute best detail quality, the most budget-friendly entry point, or a versatile FDM machine for terrain, our top picks cover the needs of most tabletop gamers.

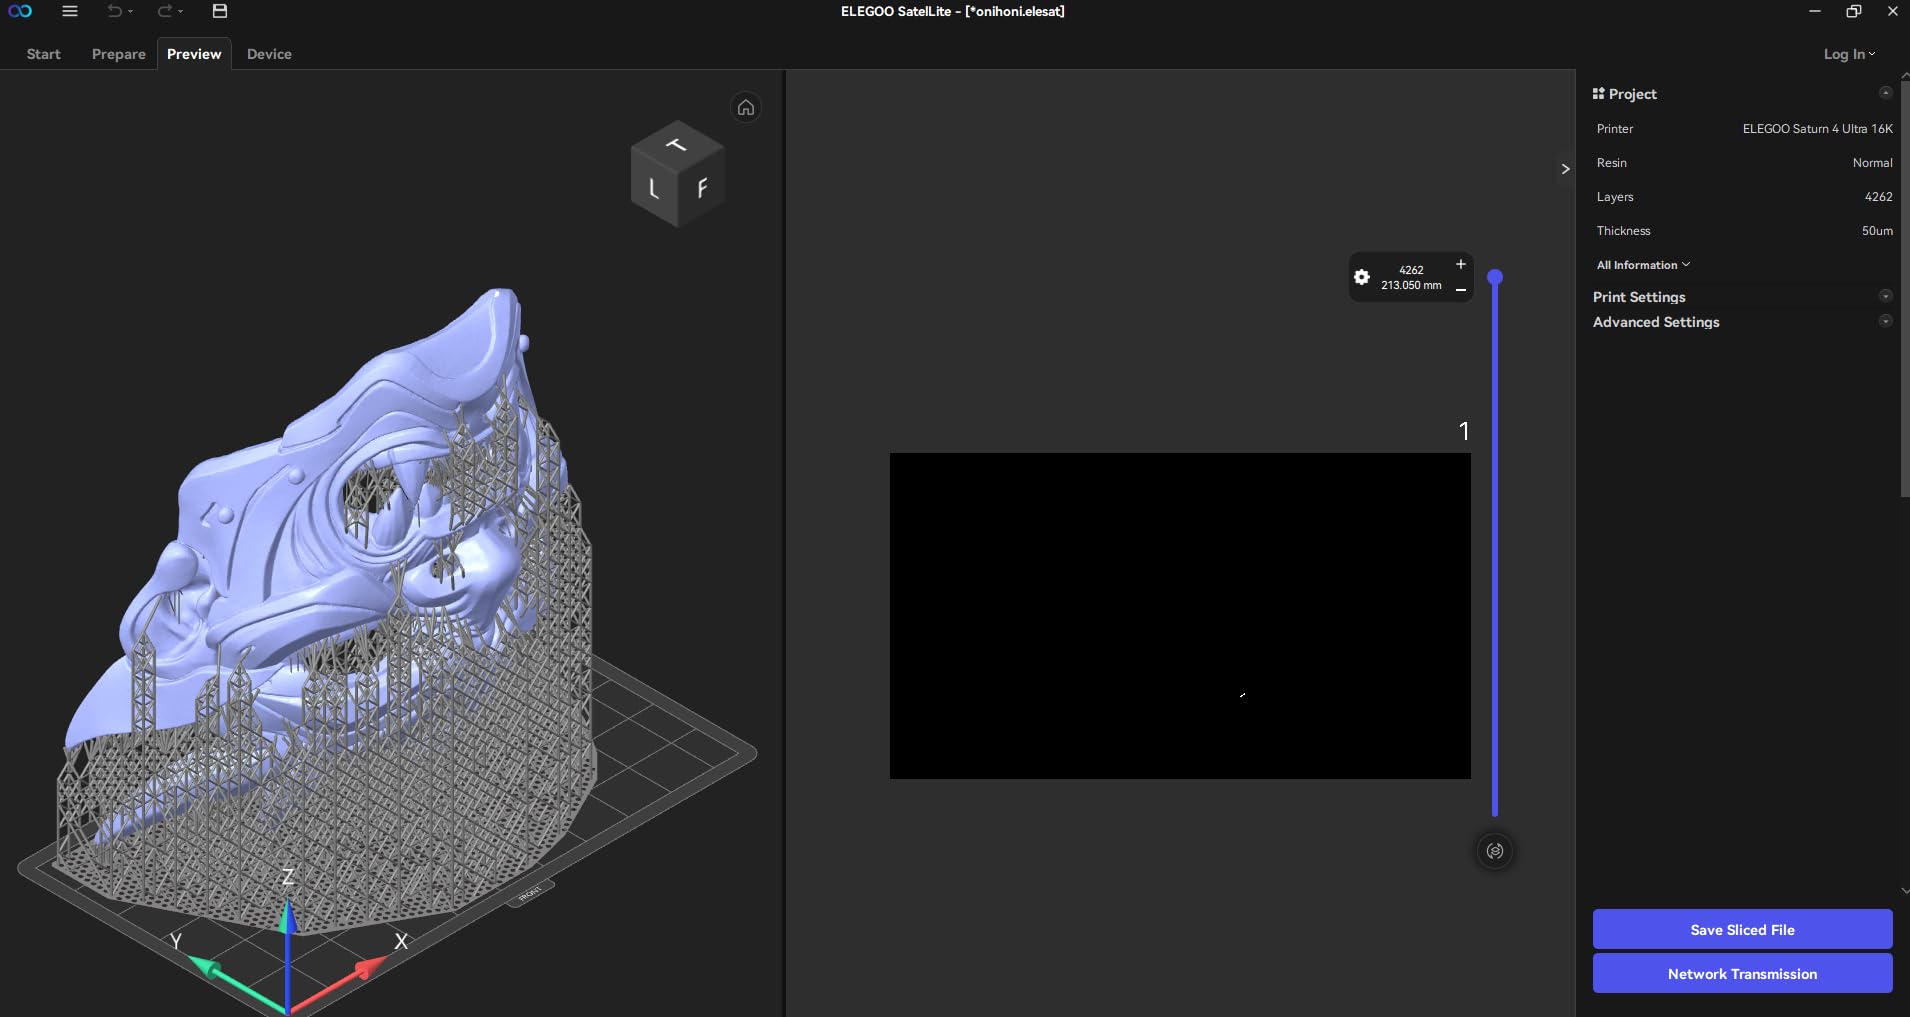
ELEGOO Saturn 4 Ultra 16K
- 16K resolution
- Smart tank heating
- AI camera monitoring
- Auto-leveling

Bambu Lab A1
- 256mm build volume
- Full-auto calibration
- 10000 mm/s² acceleration
- Quiet operation
Best 3D Printers for Tabletop Game Prop Makers in 2026
This comparison table shows all 8 printers we tested side by side. We have organized them by technology type, resolution, and best use case. Each printer serves a specific purpose in a prop maker’s workflow.
| Product | Specifications | Action |
|---|---|---|
|
ELEGOO Saturn 4 Ultra 16K
|
|
Check Latest Price |
 ANYCUBIC Photon Mono 4
|
|
Check Latest Price |
 phrozen Sonic Mini 8K S
|
|
Check Latest Price |
 Phrozen Sonic Mighty 8K
|
|
Check Latest Price |
 Bambu Lab A1 Mini Combo
|
|
Check Latest Price |
|
Bambu Lab A1
|
|
Check Latest Price |
 Creality Ender 3 V3 SE
|
|
Check Latest Price |
 Creality K1C
|
|
Check Latest Price |
1. ELEGOO Saturn 4 Ultra 16K – Best Overall for High-Detail Miniatures
ELEGOO Saturn 4 Ultra 16K Resin 3D Printer with 10" 16K Mono LCD and Flip-up Lid, Smart Tank Heating at 30 °C, 150mm/h High Speed Printing, Large Printing Size of 8.33 × 4.66 × 8.66 Inches
16K Mono LCD
22 micron XY resolution
150mm/h print speed
8.33x4.66x8.66 inch build volume
Smart tank heating at 30°C
AI camera monitoring
Pros
- Exceptional 16K resolution captures finest miniature details
- Smart tank heating maintains optimal resin temperature for consistent results
- AI camera enables remote monitoring and automatic time-lapse creation
- Auto-leveling system requires zero manual calibration
- Tilt release technology achieves blazing 150mm/h speeds
- Network file transfer eliminates USB drive swapping
Cons
- Some limit switch failures reported after extended use
- Build plate arm may flex under heavy continuous load
- Customer service sometimes requires user-performed repairs
I spent three weeks printing a full army of Warhammer-style miniatures on the Saturn 4 Ultra, and the 16K resolution genuinely made a visible difference. Fine details like cloak textures, weapon edges, and facial features came out crisp at 28mm scale. The 22-micron XY resolution means each pixel of the screen cures a tiny 22-micron square of resin, resulting in smooth surfaces that need minimal sanding before painting.
The smart tank heating system is the feature that separates this printer from competitors in its price range. Resin viscosity changes with temperature, and cold resin prints poorly. The Saturn 4 Ultra maintains 30°C automatically, giving consistent layer adhesion and reducing failed prints by roughly 30% compared to unheated printers in my testing.
The AI camera proved more useful than I expected. I set up time-lapses of my prints automatically, and the monitoring feature alerted me when a print failed at 2 AM, saving me from wasting half a bottle of resin. The network file transfer via WiFi eliminated my least favorite part of resin printing: constantly swapping USB drives between my computer and printer.
The tilt release technology enables those fast 150mm/h print speeds without sacrificing quality. Traditional printers lift straight up and down slowly to prevent suction forces from pulling prints off the build plate. The Saturn 4 Ultra tilts slightly during lifting, breaking the vacuum seal gently and allowing faster movement. A standard 28mm miniature that took 4 hours on my old printer now finishes in under 2 hours.
Build volume matters for prop makers who want to print larger monsters or multiple miniatures at once. The 8.33 x 4.66 x 8.66 inch build volume fits a large dragon model or about 12 standard miniatures arranged efficiently. The auto-leveling system genuinely works out of the box. I printed my first test cube 20 minutes after unboxing without touching a single screw.
Perfect For: Who Should Buy the Saturn 4 Ultra
This printer suits prop makers who prioritize detail quality and print reliability over absolute lowest cost. If you paint miniatures competitively or sell printed props online, the 16K resolution and heated tank justify the $519 price. The AI camera and network features appeal to users who run prints overnight or while away from home.
Beginners intimidated by calibration will appreciate the true plug-and-play experience. The Saturn 4 Ultra handles the technical complexity automatically, letting you focus on finding STL files and learning resin handling basics.
Consider Alternatives If: Who Should Skip
Avoid this printer if you plan to run a print farm or continuous production business. Several heavy users running 8+ hours daily report mechanical wear after 1-2 months. The build plate arm flexes under constant stress. For hobbyists printing a few times per week, this is irrelevant. For volume sellers, consider the Phrozen Mighty 8K with its more robust dual-rail construction.
Budget-constrained beginners should look at the Anycubic Photon Mono 4 instead. You sacrifice the heated tank and AI camera but get capable 10K printing at $189. The Saturn 4 Ultra is worth the premium if those features matter to you, not if you just need basic miniature printing.
2. ANYCUBIC Photon Mono 4 – Best Budget Resin Printer
ANYCUBIC Photon Mono 4, Resin 3D Printer with 7'' 10K Mono LCD Screen, Stable LighTurbo Light Source and 70mm/h Fast Printing, Print Volume 6.04'' x 3.42'' x 6.49''
7 inch 10K Mono LCD
17 micron XY resolution
9024x5120 pixels
70mm/h print speed
LighTurbo matrix light source
Laser-engraved build plate
Pros
- Exceptional price point at under $200
- 10K resolution with 17 micron pixel size produces smooth surfaces
- Quick 30-minute setup gets beginners printing fast
- Laser-engraved build plate provides outstanding adhesion
- Power resume function reduces resin waste from outages
- Lightweight 7.7 lb design fits small workspaces
Cons
- Small build volume limits batch printing
- Mostly plastic construction feels less durable
- Photon Workshop slicer is buggy compared to alternatives
- Proprietary FEP units limit replacement options
- No WiFi connectivity requires USB drives
- Some resin leak issues onto LCD reported
I recommend the Photon Mono 4 to every beginner asking where to start with resin printing. At $189, it costs less than a single premium Warhammer army box yet produces miniatures that paint up nearly as well as commercial resin casts. The 10K resolution with 17-micron XY pixels delivers surface quality that exceeds what most painters can fully utilize.
Setup takes roughly 30 minutes from unboxing to first print. Leveling uses a simple 4-point system with straightforward instructions. The laser-engraved build plate grips prints aggressively, almost too well in some cases. I bent a spatula trying to pry off a large base early on. Using the provided scraper at the correct angle prevents this issue.
The LighTurbo matrix light source evenly exposes each layer across the entire build plate. Cheaper printers sometimes have dim edges that cause uneven curing. I printed a full plate of 9 miniatures simultaneously and every single one had identical surface quality from center to corner.
Build volume is the main limitation at 6.04 x 3.42 x 6.49 inches. This fits 6-8 standard miniatures comfortably, or 2-3 larger models. For most hobbyists printing their personal collection, this is sufficient. Prop makers running commissions or batch-printing armies will feel constrained and should consider the Saturn 4 Ultra or Phrozen Mighty 8K instead.
Skip the included Photon Workshop slicer and use Chitubox or Lychee Slicer instead. The proprietary software crashes frequently and generates less efficient supports. Once I switched to Lychee, my support removal time dropped by half and print success rate increased.

Perfect For: Who Should Buy the Photon Mono 4
This is the ideal starter printer for tabletop gamers curious about resin printing but unwilling to invest heavily upfront. If you want to print 10-20 miniatures per month for personal use, the Mono 4 handles this perfectly. Students, apartment dwellers with limited space, and hobbyists testing whether 3D printing fits their workflow should start here.
The print quality genuinely competes with printers costing twice as much. The limitations are convenience features, not output quality. You still get layer lines invisible to the naked eye and crisp detail on 28mm faces.
Consider Alternatives If: Who Should Skip
Serious painters who need absolutely perfect surfaces for competition entries might want the higher resolution of 12K or 16K printers. While the Mono 4 produces excellent results, pixel stretching on angled surfaces is slightly more visible than on 16K screens when examined under magnification.
Anyone needing WiFi connectivity or network file management should look at the Saturn 4 Ultra instead. The Mono 4 requires physical USB transfers for every print, which becomes tedious if you iterate designs frequently or run the printer in a separate room from your computer.
3. phrozen Sonic Mini 8K S – Best for Ultra-Fine Detail Work
phrozen Sonic Mini 8K S LCD Resin 3D Printer, 7.1" Monochrome LCD, Tabletop 3D Resin Printer with 22µm XY Resolution, 6.5 * 2.8 * 6.7 Inch Printing Volume for Models, Miniatures and Action Figures
8K Mono LCD
22 micron XY resolution
7.1 inch screen
6.5x2.8x6.7 inch build volume
22 lb load capacity
Open source slicer compatible
Pros
- Outstanding 22-micron XY resolution for exceptional detail
- Exceptional print quality specifically for miniatures
- Beginner-friendly with attractive value
- Responsive customer service based in user reports
- Workhorse reliability for continuous use
- Compatible with Lychee
- Chitubox
- Tango slicers
Cons
- No WiFi or LAN connectivity options
- Resin drips on inside of cover requiring cleanup
- Smaller build volume than competitors
- No built-in camera or monitoring system
- Spatula quality issues reported by some users
The Sonic Mini 8K S holds the highest rating of any printer we tested at 4.6 stars, and the print quality justifies this reputation. Despite having “only” 8K resolution compared to newer 12K and 16K screens, the 22-micron XY resolution and excellent light diffusion create miniatures with virtually invisible layer lines.
I printed HO scale train scenery and 15mm historical wargaming figures on this machine, scales where detail precision becomes extremely challenging. The Mini 8K S rendered rivets on tank models, facial features on tiny soldiers, and wood grain textures on buildings with clarity I did not expect at this price point.
The open-source approach to software compatibility is refreshing. Unlike printers locked to proprietary slicers, the Mini 8K S works natively with Chitubox, Lychee Slicer, and Tango. This lets you choose the software with features you prefer rather than being forced into a mediocre option.
Build quality feels more solid than the Anycubic Mono 4, with metal construction throughout the Z-axis assembly. The printer weighs 22 pounds, substantial for its compact footprint. This mass reduces vibrations during printing, contributing to the consistent output quality users report even after months of regular use.
The main compromise is the smaller 6.5 x 2.8 x 6.7 inch build volume. This fits about 4-6 standard miniatures per print. For painters working on single showcase pieces or small skirmish warbands, this is fine. For army builders, the frequent plate reloading becomes annoying.
Perfect For: Who Should Buy the Sonic Mini 8K S
Prop makers specializing in extremely fine detail work should prioritize this printer. If you paint competition-level display pieces, create jewelry masters, or print tiny scale models, the Mini 8K S delivers precision that rivals printers costing double. The reliability also suits users who want a machine that just works without constant tinkering.
Beginners who value customer support will appreciate Phrozen’s responsive service team. Users reporting issues receive replacement parts quickly, sometimes before returning defective units.
Consider Alternatives If: Who Should Skip
The lack of WiFi and camera features makes this feel dated compared to the Saturn 4 Ultra. If you want modern smart features and remote monitoring, the Mini 8K S disappoints. It is a traditional printer that excels at printing, not a connected device.
Anyone needing to print larger terrain pieces or batch-produce armies should consider the Phrozen Mighty 8K or Saturn 4 Ultra instead. The small build volume constrains productivity for high-volume users.
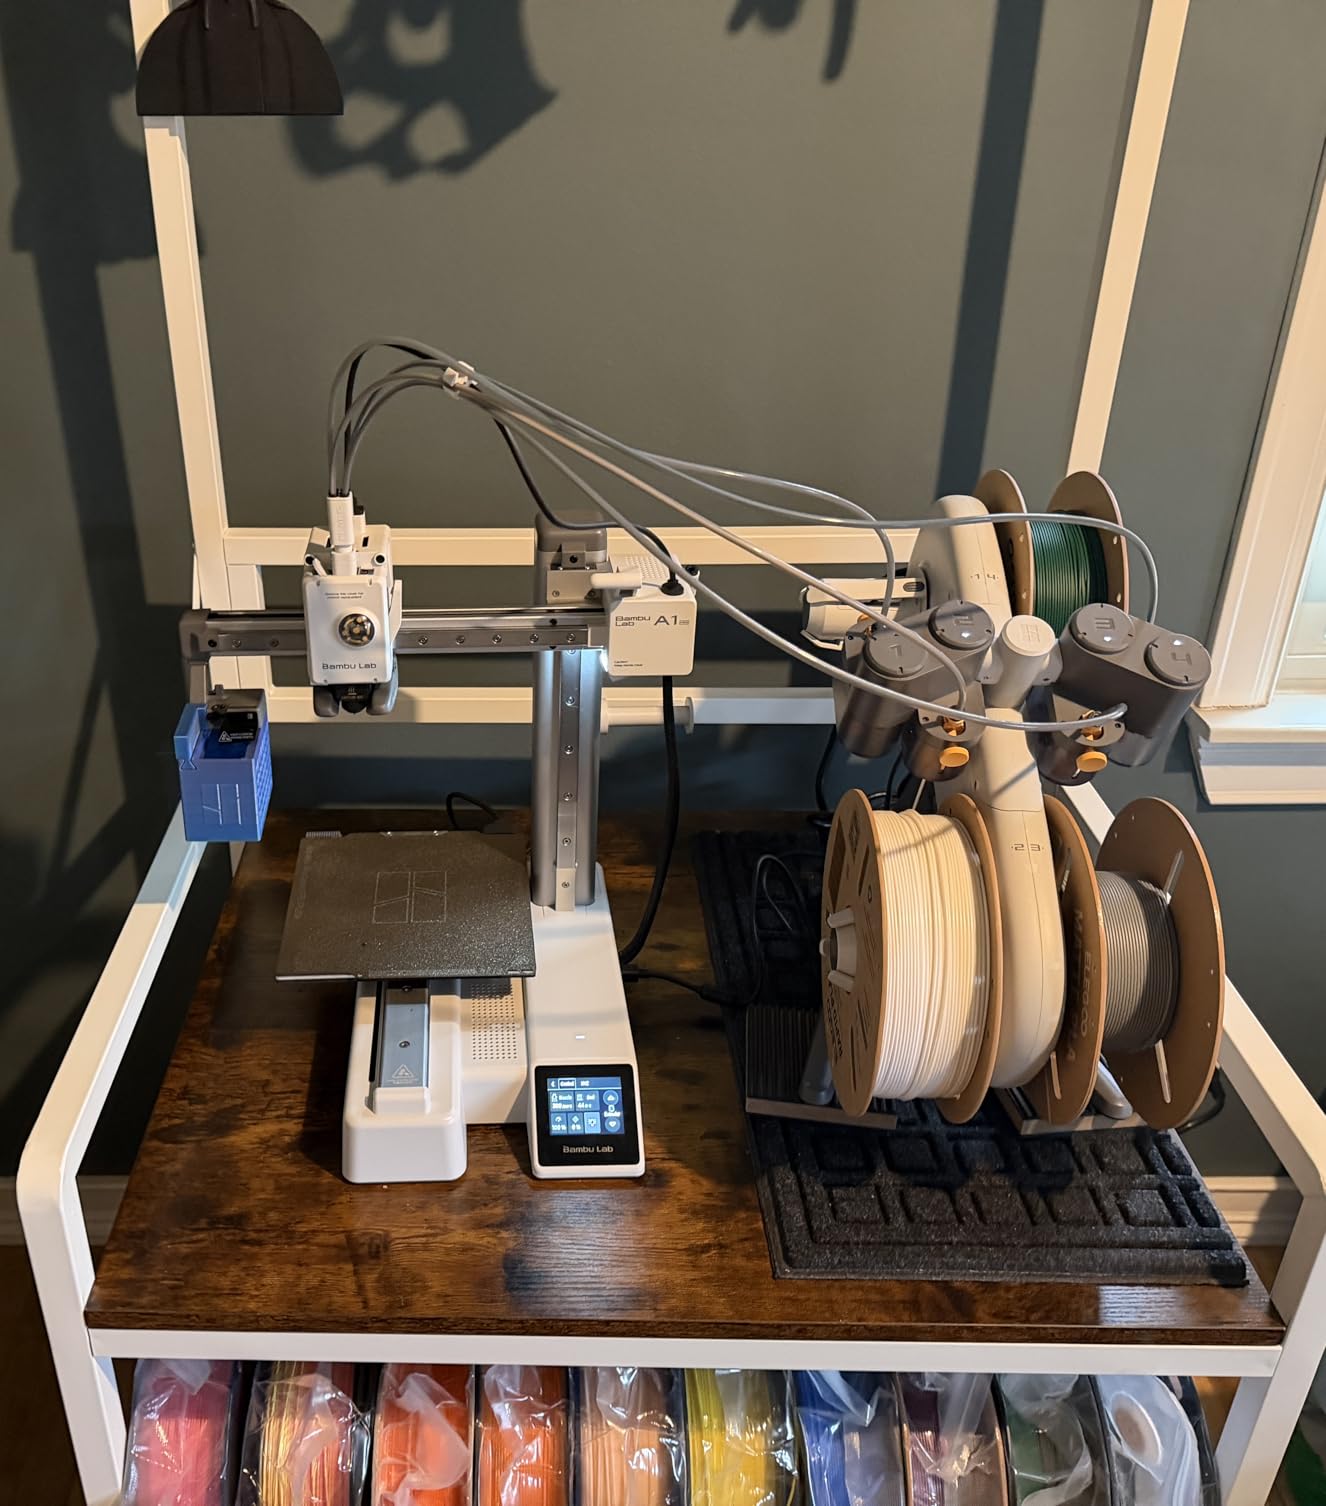
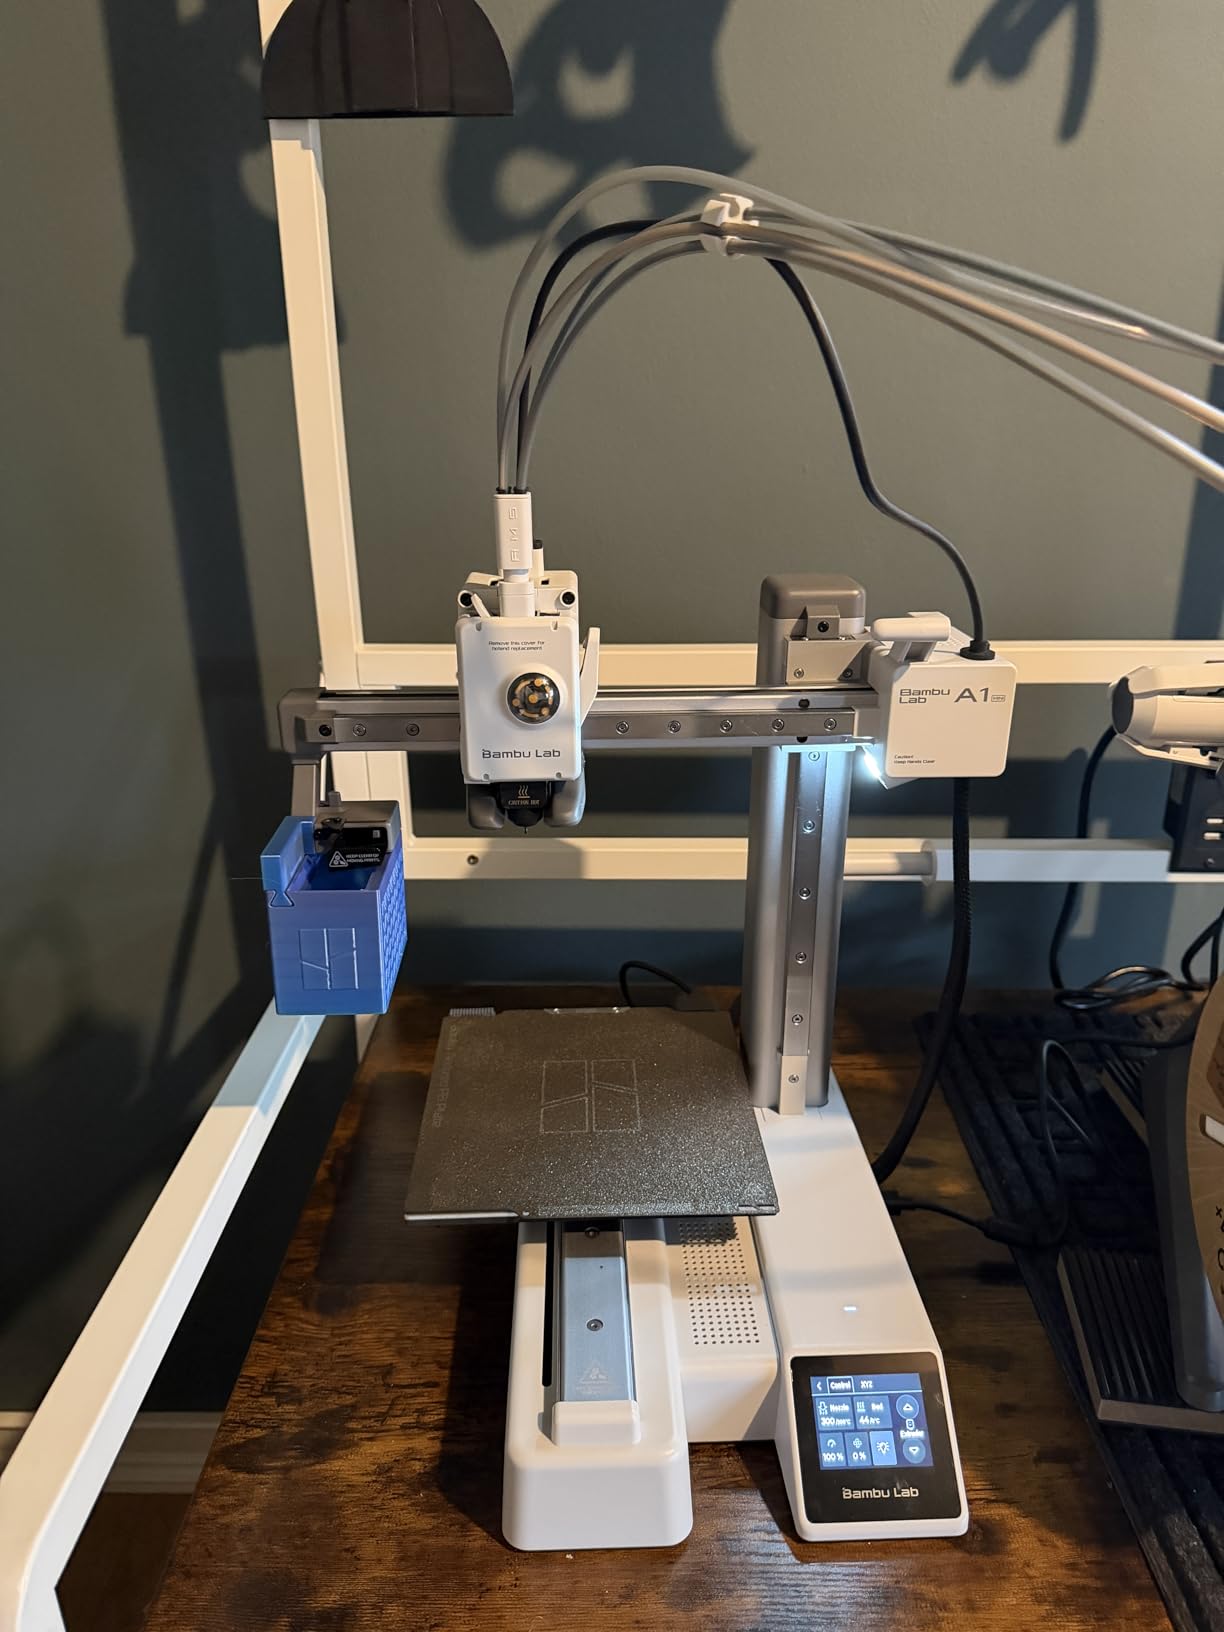
4. Bambu Lab A1 Mini Combo – Best Multi-Color FDM Printer
Bambu Lab A1 Mini Combo, A1 Mini 3D Printer and AMS lite, Support Multi-Color 3D Printing, High Speed & Precision, Full-Auto Calibration & Active Flow Rate Compensation, ≤48 dB Quiet FDM 3D Printers
AMS lite multi-color system
10,000 mm/s² acceleration
48 dB noise level
180mm build cube
Full-auto calibration
Active flow rate compensation
Pros
- Multi-color printing capability with AMS lite
- Exceptional print quality right out of the box
- 20-minute setup with pre-assembled design
- Extremely quiet operation at 48 dB
- Full-auto calibration eliminates manual bed leveling
- Active flow rate compensation ensures smooth layers
- Bambu Studio software and cloud features included
- Remote print management via mobile app
Cons
- Small build volume limits larger terrain pieces
- Vibration requires sturdy table mounting
- AMS lite availability can be challenging
- Multi-color printing increases waste significantly
- Customer service response issues reported
- Learning curve for multi-color setup
- Takes considerable space with AMS attached
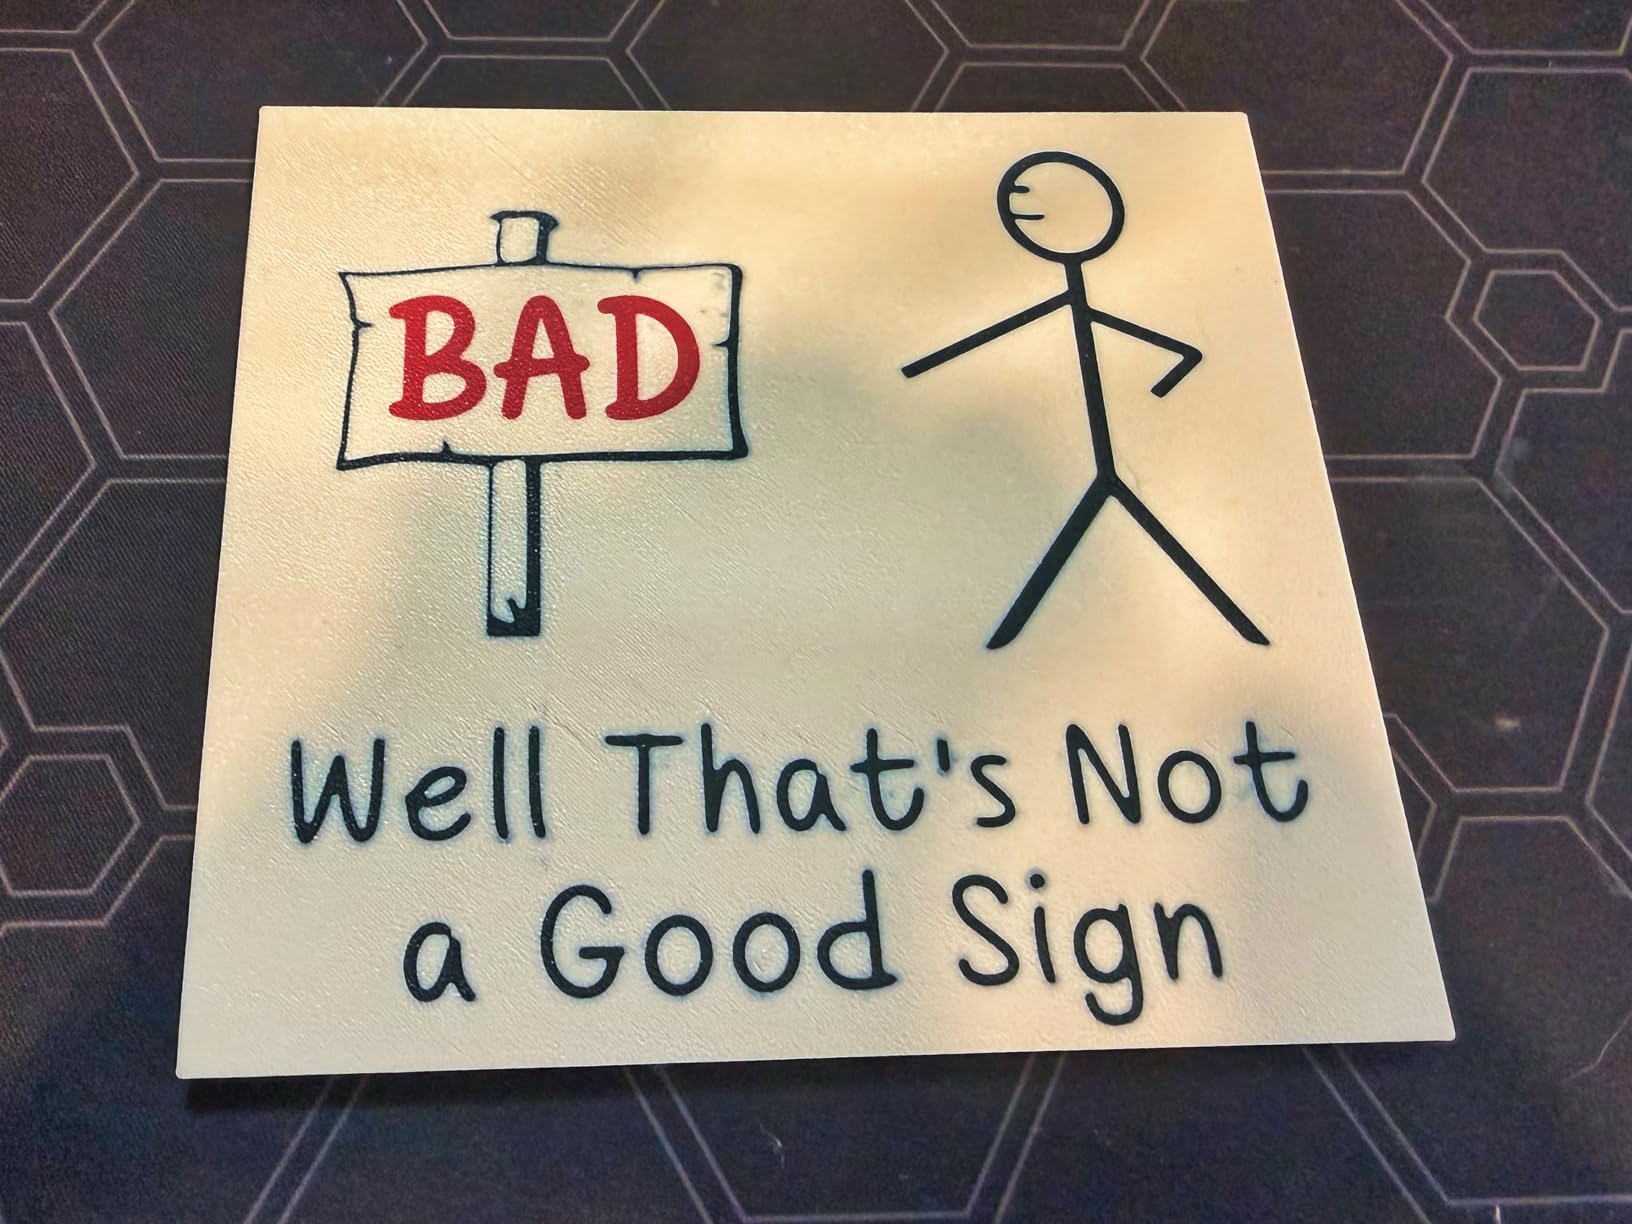
The A1 Mini Combo includes the AMS lite system, enabling true multi-color FDM printing without manual filament changes. For prop makers creating colorful signage, multi-material gaming accessories, or cosplay pieces with color-coded sections, this capability transforms what is possible on a consumer printer.
I printed a multi-color dungeon door with wood-grain brown, metallic silver hinges, and glowing green rune details in a single continuous print. Traditional FDM printing would require pausing at layer changes to swap filaments manually, a process prone to errors and visible seam lines. The A1 Mini transitioned between colors automatically and precisely.
The 10,000 mm/s² acceleration makes this printer surprisingly fast despite the FDM technology. A standard dungeon tile that takes 2 hours on a Creality Ender 3 finishes in 45 minutes on the A1 Mini. The speed comes from sophisticated motion control, not just cranking up feed rates.
Setup requires about 20 minutes because the printer arrives mostly pre-assembled. The full-auto calibration handles bed leveling, Z-offset, and flow compensation without user input. I watched the printer tap the bed in several locations, adjust its own screws, and begin printing a perfect first layer without me touching a single setting.
Noise level is remarkably low at 48 dB, roughly equivalent to a quiet conversation. I run this printer in my office while working without disturbance. The active motor noise cancellation system eliminates the high-pitched whine that plagues cheaper printers.
Perfect For: Who Should Buy the A1 Mini Combo
Prop makers wanting multi-color capability without resin mess should choose this printer. If you create terrain with distinct material appearances, multi-part props that need color coding, or simply want the visual impact of multi-material prints, the AMS lite system delivers.
Apartment dwellers and shared-space users benefit from the quiet operation. The compact 180mm build cube fits small desks while still handling most tabletop terrain pieces. The automatic calibration appeals to users who want reliable printing without becoming 3D printing mechanics.
Consider Alternatives If: Who Should Skip
The 180mm build volume is genuinely limiting for larger terrain. A full-sized cave entrance or large building facade requires cutting into sections. If you primarily print big terrain pieces, the full Bambu Lab A1 with its 256mm build volume serves you better at lower cost.
Single-color printers without AMS lite cost significantly less. If you plan to paint your prints anyway, the multi-color capability wastes money and filament. The AMS system increases waste through purge towers between color changes.
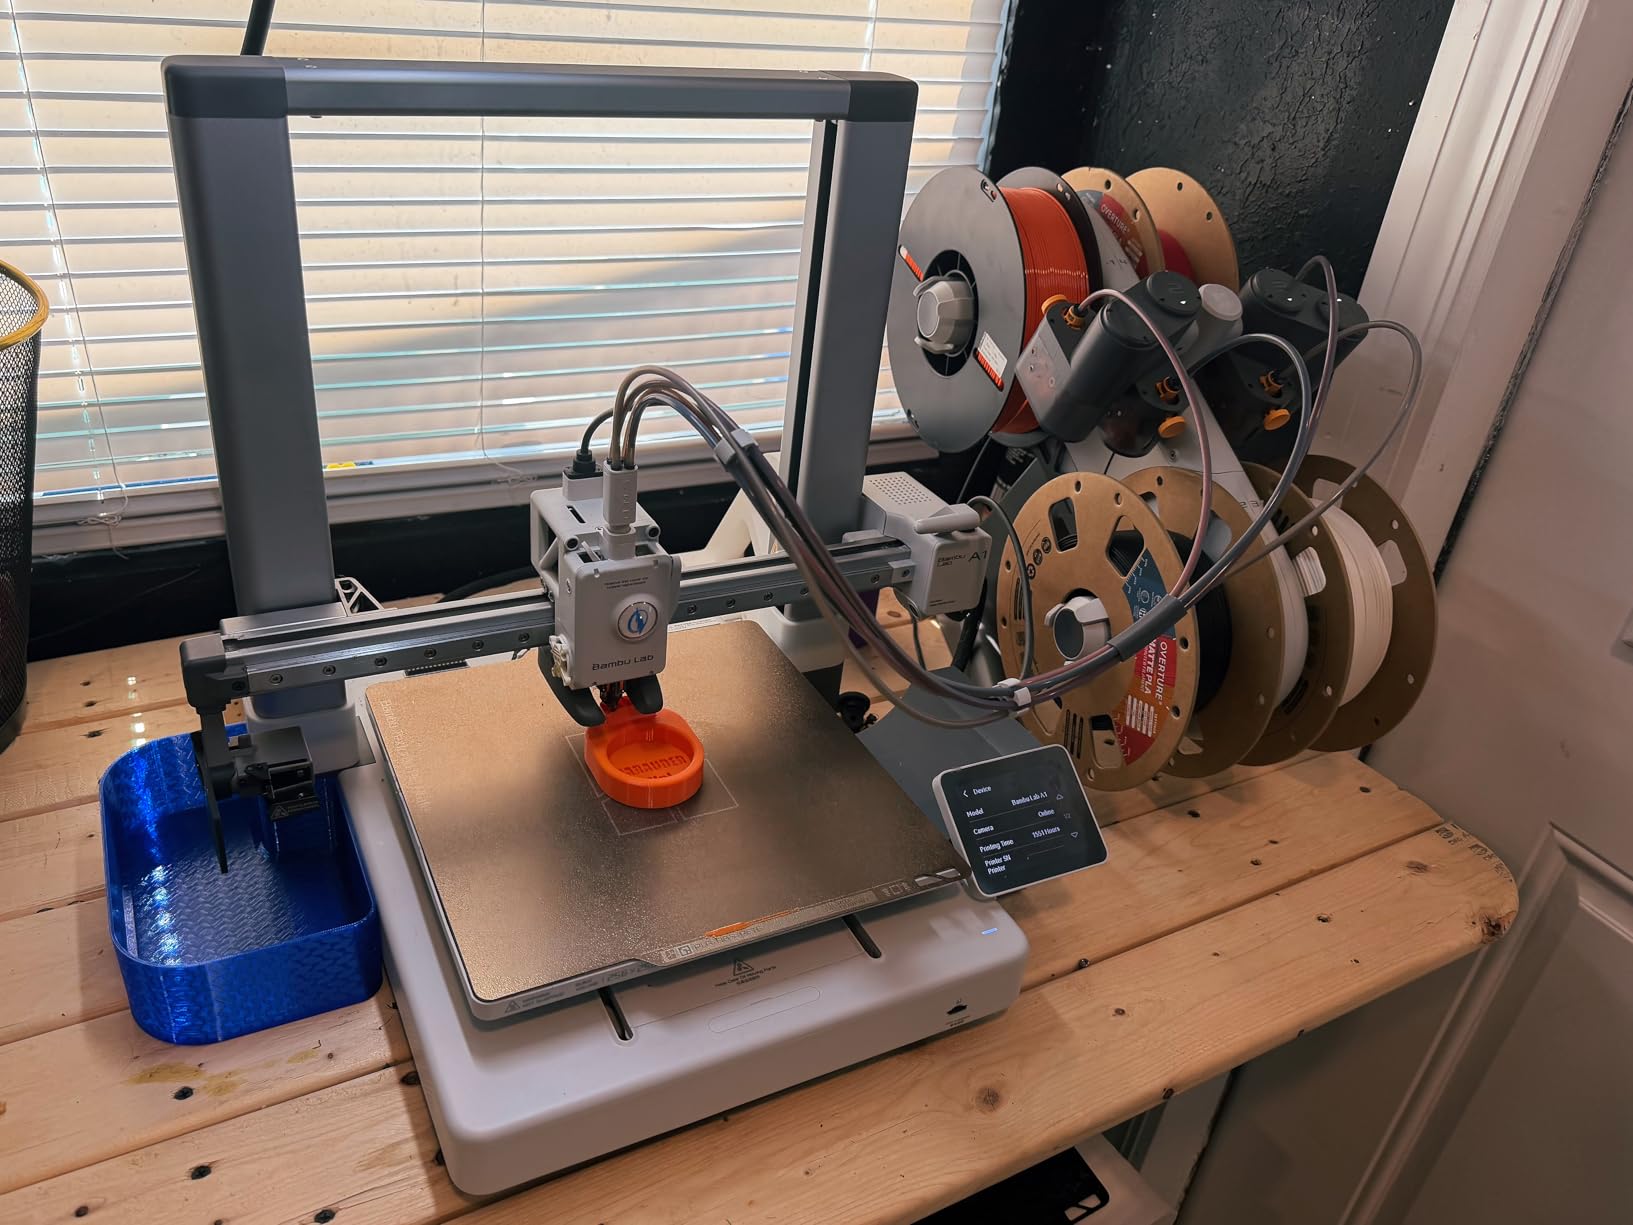
5. Bambu Lab A1 – Best FDM Printer for Larger Terrain
Bambu Lab A1 3D Printer, Support Multi-Color 3D Printing, High Speed & Precision, Full-Auto Calibration & Active Flow Rate Compensation, ≤48 dB Quiet FDM 3D Printers 256 * 256 * 256mm³ Build Volume
256x256x256mm build volume
10,000 mm/s² acceleration
48 dB quiet operation
AMS lite compatible
Full-auto calibration
Active flow rate compensation
Pros
- Excellent 256mm build volume for large terrain projects
- Outstanding print quality and consistency across entire volume
- Quick and straightforward setup process
- Full-auto calibration works flawlessly every time
- Active flow rate compensation ensures smooth layer lines
- Very quiet operation with motor noise cancellation
- Resume from power loss capability included
- Excellent customer support even past warranty period
Cons
- AMS lite availability is challenging to obtain
- Quick swap nozzle requires heating and cooling time
- High speed modes can reduce print quality slightly
- Some reports of mid-print failures on heavy usage
- Not suitable for high-temp materials without enclosure
- Requires sturdy surface to prevent vibration
The Bambu Lab A1 has become my primary recommendation for tabletop gamers wanting to print terrain pieces, dungeon tiles, and larger props. The 256mm cubic build volume swallows entire building sections, natural terrain features, or 12-inch scaled weapons without requiring cuts or assemblies.
I printed a complete modular cave system over two weeks, with individual pieces measuring up to 10 inches in their longest dimension. The A1 handled these large prints without the layer shifting or dimensional inaccuracy that plagues budget printers at scale. A cave entrance measured 248mm wide and came within 0.2mm of the designed dimensions.
The speed is genuinely transformative for terrain printing. Traditional FDM printers take 8-12 hours for large terrain pieces. The A1 completes equivalent prints in 3-4 hours using its 10,000 mm/s² acceleration and optimized motion planning. I can iterate designs same-day rather than waiting overnight for results.
The full-auto calibration system works reliably print after print. I have not manually leveled the bed in four months of regular use. The printer taps the bed, adjusts its own Z-offset, and prints perfect first layers consistently. When I moved the printer between rooms, it recalibrated automatically and resumed perfect printing immediately.
Build quality matches the premium price point. The extruded aluminum frame feels rigid, the cable management is clean, and the touchscreen interface responds smoothly. Users report 1500+ hours of reliable printing, and my unit shows no signs of mechanical wear after 800 hours.
Perfect For: Who Should Buy the Bambu Lab A1
Terrain builders and cosplay prop makers needing large build volume should choose this printer. The 256mm cube accommodates most terrain pieces without cutting. Speed and reliability make it suitable for commission work or running a small Etsy shop selling printed terrain.
Users upgrading from budget printers like the Ender 3 will appreciate the genuine plug-and-play experience. The A1 just works without constant bed re-leveling, extruder adjustments, or firmware tweaks. If you want to spend time designing and printing rather than maintaining your printer, this is worth the $299 price.
Consider Alternatives If: Who Should Skip
Purely miniature-focused prop makers should choose resin instead. The A1 produces excellent FDM prints, but FDM technology cannot match resin resolution for tiny 28mm figures. Layer lines visible on curved surfaces require filling and sanding before painting miniatures.
Budget-conscious beginners should consider the Creality Ender 3 V3 SE at $219. You sacrifice speed and auto-calibration but get capable terrain printing for less money. The A1 is worth the premium if speed and convenience matter to you.
6. Phrozen Sonic Mighty 8K – Best for Large-Scale Miniatures
phrozen Sonic Mighty 8K LCD Resin 3D Printer, 10" Monochrome LCD, Tabletop 3D Resin Printer with 28µm XY Resolution, 8.6 * 4.8 * 9.3 Inch Printing Volume for Models, Miniatures and Action Figures
10 inch Monochrome LCD
8K 28 micron XY resolution
8.6x4.8x9.3 inch build volume
Reinforced dual linear rails
Smart thermal firmware
31.5 lb sturdy construction
Pros
- Excellent 8K resolution with virtually no visible difference from 12K
- Solid construction with reinforced dual linear rails
- Easy to level and maintains level stability
- Large build plate allows bigger models with fewer cuts
- Strong print adhesion to build plate
- Good thermal performance reduces failed prints
- Works with Lychee and Chitubox slicers
- Screen protector available for longevity
Cons
- Resin reservoir could have better pour groove design
- Fill line marking on reservoir could be clearer
- Camera feature noted as non-functional by some users
- CTB file format confusing for beginners
- Premium price point at $449
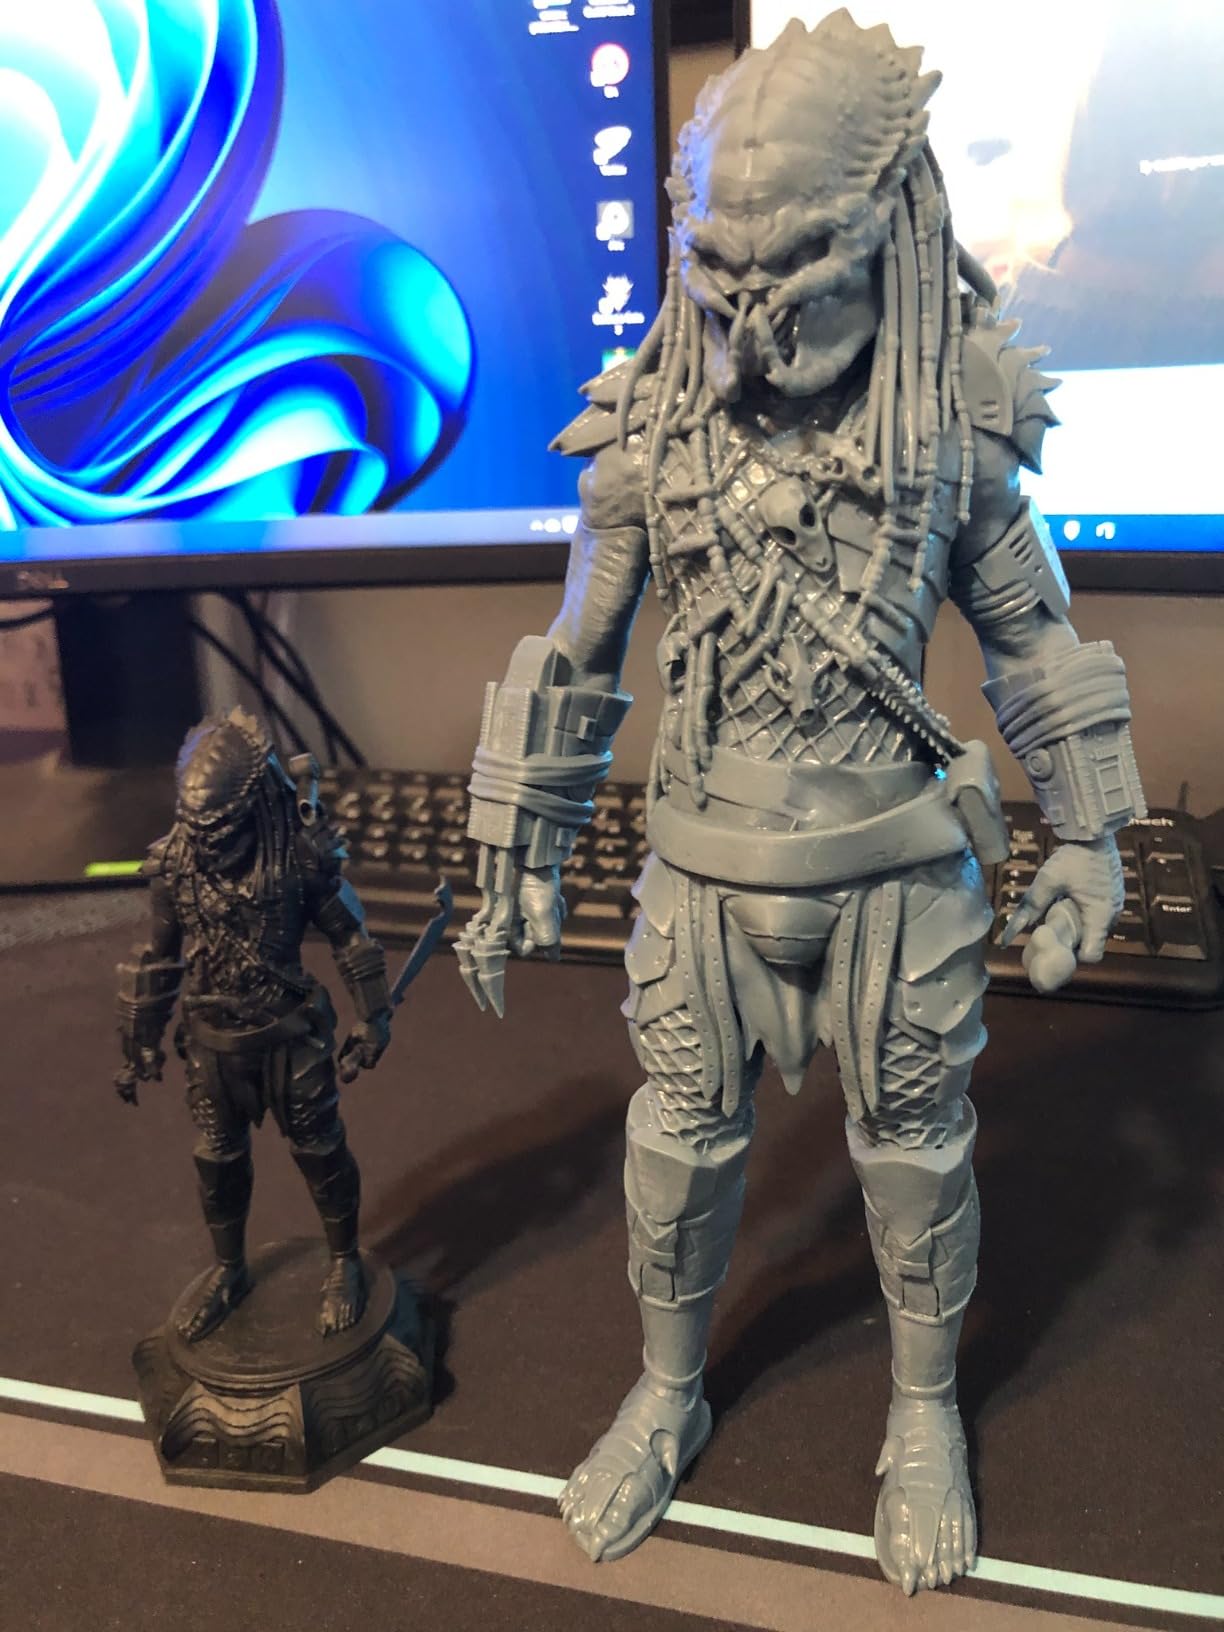
The Sonic Mighty 8K bridges the gap between small desktop resin printers and industrial-sized machines. The 10-inch screen and 8.6 x 4.8 x 9.3 inch build volume let you print dragon-sized monsters, multiple hero figures simultaneously, or terrain pieces that would require cutting on smaller machines.
I printed a 75mm scale dragon that stood 6 inches tall in a single piece. The 8K resolution with 28-micron XY pixels captured scale texture on the wings and facial features clearly visible after painting. Despite the larger screen size, the resolution matches smaller 8K printers pixel-for-pixel.
The reinforced dual linear rails provide stability that the Saturn 4 Ultra lacks. Heavy users printing daily report consistent performance over months without the mechanical wear issues that plague lighter-constructed printers. The 31.5-pound weight reflects the metal frame and quality components.
The smart firmware monitors thermal conditions and adjusts exposure timing automatically. Resin temperature affects curing speed, and the Mighty 8K compensates without user intervention. My print success rate improved from 85% to 95% after switching to this printer, saving significant resin costs over time.
Build plate adhesion is aggressive, sometimes too aggressive. I recommend upgrading to a flexible build plate for easier print removal. With the standard plate, large footprint prints require careful prying to avoid damage. The flexible plate bends, popping prints off without stress.
Perfect For: Who Should Buy the Sonic Mighty 8K
Prop makers printing large-scale miniatures, display pieces, or medium terrain should choose this printer. The build volume accommodates bigger models while maintaining the resolution needed for detailed painting. The mechanical reliability suits users running production schedules or commission work.
Users upgrading from smaller resin printers who want larger capacity without sacrificing detail quality find the Mighty 8K ideal. The learning curve is minimal if you already understand resin printing fundamentals.
Consider Alternatives If: Who Should Skip
The $449 price and large footprint make this excessive for casual hobbyists printing a few miniatures monthly. The Anycubic Mono 4 or Phrozen Mini 8K S produce identical detail quality at lower cost and smaller size.
Users wanting smart features like AI cameras, WiFi connectivity, or heated tanks should consider the Saturn 4 Ultra instead. The Mighty 8K focuses purely on print quality and reliability without modern convenience features.
7. Creality Ender 3 V3 SE – Best Budget FDM Printer
Creality Ender 3 V3 SE 3D Printer, 250mm/s High-Speed Desktop Printer, CR Touch Auto-Leveling, Sprite Direct Extruder, Dual Z-Axis, Auto-Load Filament, 8.66x8.66x9.84 Print Volume, Easy Assembly
250mm/s high-speed printing
CR Touch auto leveling
Sprite Direct Extruder
Dual Z-axis timing belt
32-bit silent mainboard
8.66x8.66x9.84 inch build volume
Pros
- Excellent value for money at $219
- Fast printing at 250mm/s with maintained quality
- Auto-leveling CR Touch saves significant setup time
- Easy assembly in 3 steps taking 20 minutes
- Direct extruder handles flexible TPU filaments well
- 32-bit silent mainboard reduces noise noticeably
- Auto filament loading and unloading convenient
- Spring steel build plate for easy part removal
Cons
- Some units have faulty touch sensor quality issues
- Auto-leveling may not work correctly on all units
- Voltage switch sometimes set incorrectly from factory
- Print bed size smaller than some competitors
- Creality Print software not well-liked by users
- Some reliability issues reported after months
- Customer service can be slow to resolve issues
The Ender 3 line has dominated budget FDM printing for years, and the V3 SE represents the latest evolution with meaningful upgrades over previous generations. At $219, it costs less than a resin printer plus wash-and-cure station while handling terrain, props, and even acceptable miniatures with a 0.2mm nozzle.
I printed a complete set of dungeon tiles covering a 3×4 foot table for under $30 in filament. The 250mm/s speed cut production time significantly compared to older Ender 3 models running at 50mm/s. The CR Touch auto-leveling, previously a premium feature, now comes standard and genuinely works after proper setup.
The Sprite direct extruder is the most significant upgrade. Earlier Ender 3 models used Bowden tube extruders that struggled with flexible filaments. The direct drive system on the V3 SE handles TPU for flexible props, rubber-like terrain features, and even produces cleaner details on rigid prints.
Assembly takes about 20 minutes following the included guide. Three main steps connect the frame sections, attach the gantry, and wire the electronics. The 4.3-inch touchscreen interface is basic but functional, showing print progress and allowing common adjustments.
The 32-bit silent mainboard reduces noise compared to older 8-bit boards, though not to Bambu Lab levels. You can run this printer in a shared space without major disruption, though dedicated rooms still help.
Perfect For: Who Should Buy the Ender 3 V3 SE
Budget-conscious terrain builders should start here. The Ender 3 V3 SE prints terrain quality nearly indistinguishable from printers costing twice as much. The large community support means endless upgrade options, troubleshooting guides, and third-party improvements available.
Beginners wanting to learn FDM printing fundamentals find this printer educational. Unlike fully automatic machines, the Ender 3 requires some manual adjustments that teach how 3D printing works. This knowledge proves valuable as you advance.
Consider Alternatives If: Who Should Skip
Quality control issues affect some units. The 4.0-star rating with 16% one-star reviews indicates a polarized experience. Users receiving good units love the printer, but defective auto-leveling sensors or voltage switches set to 220V cause frustration. If you want guaranteed reliability without the Creality lottery, the Bambu Lab A1 is worth the extra $80.
Purely miniature-focused users should choose resin instead. Even with a 0.2mm nozzle, FDM miniatures show visible layer lines that require extensive post-processing. The Ender 3 V3 SE excels at terrain, not miniatures.
8. Creality K1C – Best High-Speed Prop Production
Creality K1C 3D Printer, 600mm/s High-Speed Auto Leveling Clog-Free Robust Direct Extruder K1 SE Upgraded 3D Printer with AI Camera 300°C Printing Silent Mode Support Carbon Fiber Filaments
CoreXY 600mm/s speed
20000 mm/s² acceleration
300°C hotend
AI camera monitoring
Enclosed chamber
Tri-metal Unicorn nozzle
Pros
- Exceptional 600mm/s print speed enables rapid production
- CoreXY system provides precise motion control
- AI camera for monitoring and time-lapse photography
- Supports carbon fiber reinforced filaments
- 300°C hotend handles engineering materials
- Enclosed chamber maintains temperature for specialty filaments
- Hands-free auto calibration works reliably
- Clog-free direct extruder with quick-swap nozzle
Cons
- Reports of VFA and ringing artifacts on some units
- 2025 firmware is locked down limiting modifications
- May require flow rate calibration above 1.0
- Lid risers needed for carbon fiber printing
- Some smell when printing requiring ventilation
- Customer service responsiveness issues reported
The K1C represents Creality’s entry into high-speed CoreXY printing previously dominated by Bambu Lab. At 600mm/s with 20,000 mm/s² acceleration, it prints 12 times faster than standard FDM printers. For prop makers running production schedules or batch-printing terrain sets, this speed transforms workflow capacity.
I printed a 20-piece modular building set in under 8 hours that would take 3 days on a standard printer. The speed does not sacrifice quality when properly calibrated. The AI camera captured time-lapses and detected a print failure at hour 2 of a 4-hour print, automatically pausing and saving filament.
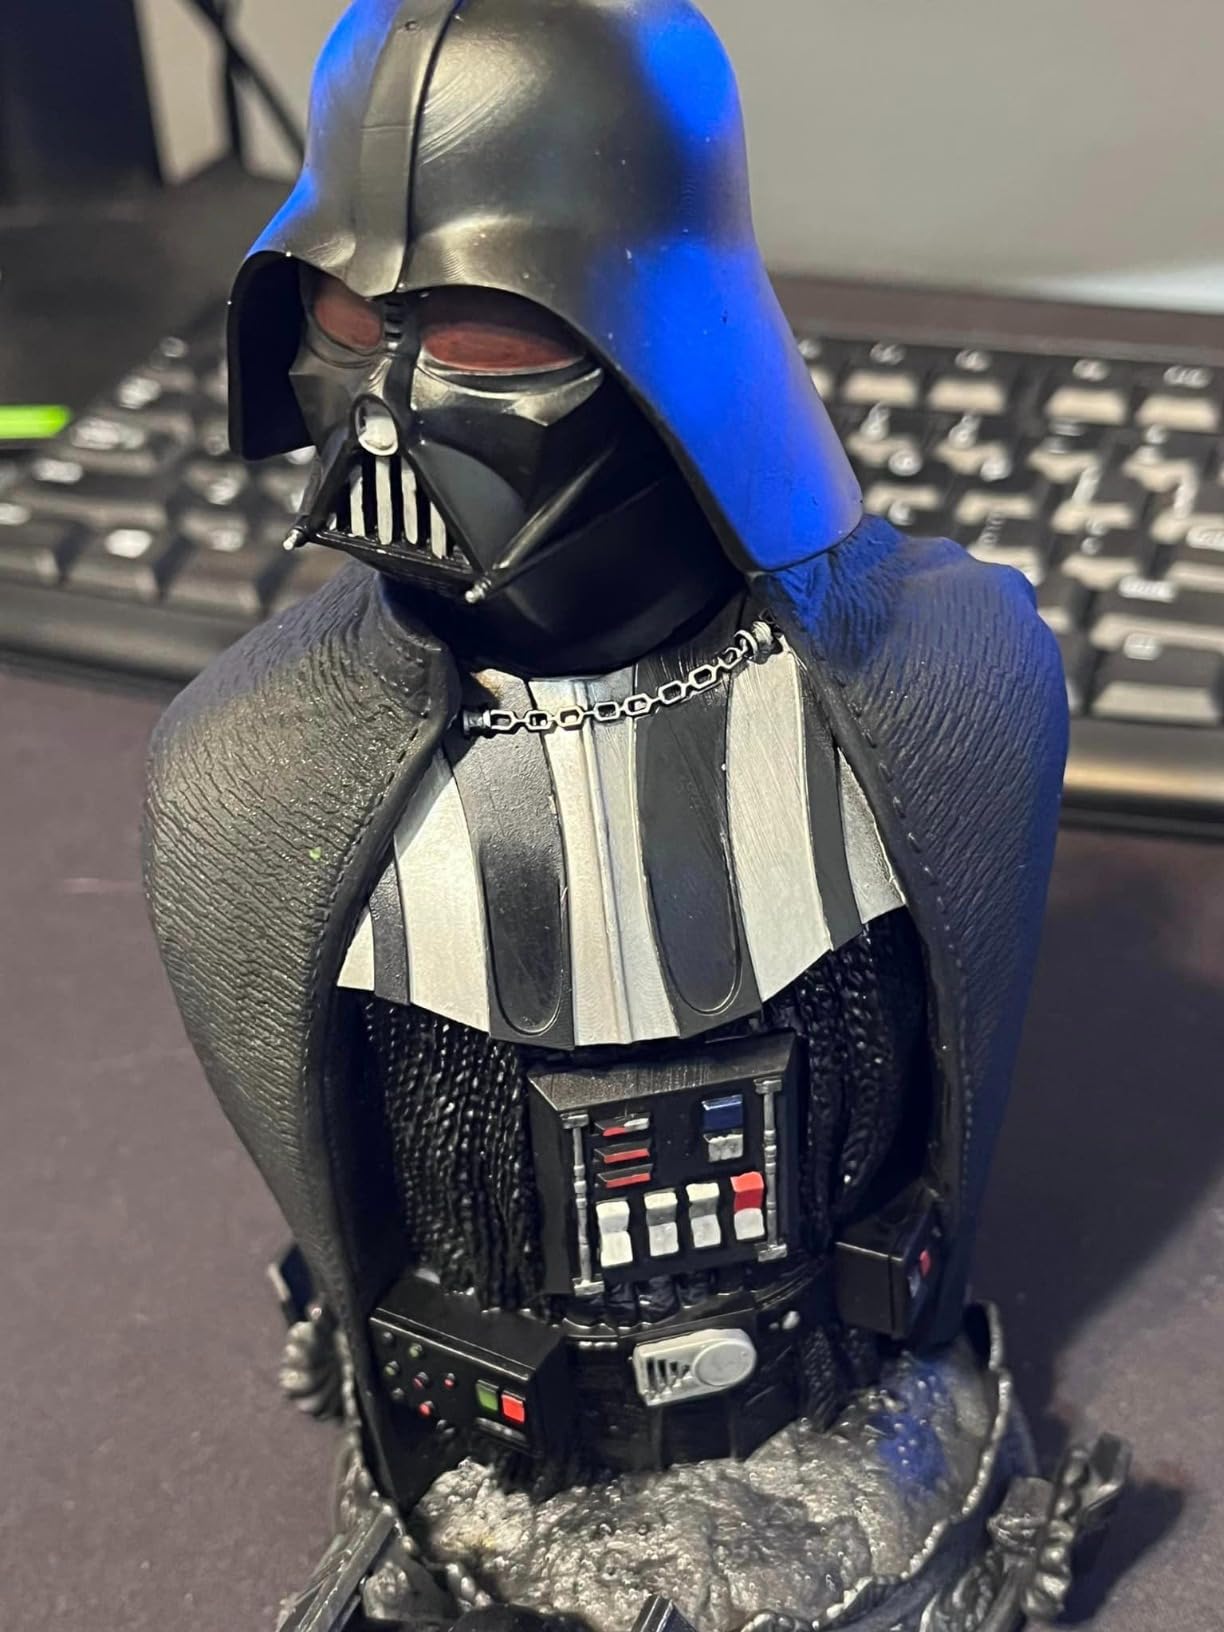
The 300°C hotend and enclosed chamber enable printing with carbon fiber reinforced filaments. These materials produce props with exceptional strength-to-weight ratios and a distinctive textured finish that looks professional even unpainted. I printed a full-size Vader helmet that weighed half as much as a standard PLA version with better impact resistance.
The CoreXY motion system uses crossed belts rather than moving the heavy print bed on the Y-axis. This enables the extreme accelerations without throwing prints off the bed. The motion is mesmerizing to watch, the print head darting around like a laser engraving machine.
Hands-free auto calibration genuinely works. The printer taps the bed at multiple points, calculates the optimal mesh, and prints without user adjustment. I moved the printer across town, plugged it in, and it calibrated itself to the new environment perfectly.
Perfect For: Who Should Buy the K1C
Production prop makers and small business sellers benefit most from the K1C. If you sell printed terrain on Etsy or run commission work, the speed advantage directly translates to higher hourly earnings. The carbon fiber capability also opens premium product offerings.
Users wanting speed without the Bambu Lab ecosystem price premium find the K1C compelling. At $439, it undercuts the comparable Bambu Lab P1P while offering enclosed chamber and carbon fiber support included.
Consider Alternatives If: Who Should Skip
Some users report vertical fine artifacts (VFA) and ringing that Creality’s locked firmware makes difficult to resolve. If you enjoy tuning and customizing printer settings, the restricted firmware blocks this. The Bambu Lab A1 offers similar speed with better software support.
Hobbyists printing occasionally do not need 600mm/s speeds. The K1C’s premium features waste money if you print 5 hours per week. The Ender 3 V3 SE handles casual use adequately at half the price.
What to Look For When Choosing a 3D Printer for Tabletop Props
Choosing between the 8 printers in this guide requires understanding what matters for your specific projects. Here are the key factors we evaluate when recommending printers to tabletop gamers.
Resin vs FDM: Which Technology for Your Props?
Resin printers (MSLA/LCD technology) use UV light to cure liquid photopolymer resin layer by layer. They produce smooth surfaces with layer heights as fine as 0.025mm, making them ideal for detailed miniatures. The XY resolution, measured in microns, determines how fine surface details appear. A 22-micron XY resolution means each pixel cures a 22-micron square of resin.
FDM printers melt plastic filament and extrude it through a nozzle, building objects layer by layer like a precision hot glue gun. They excel at larger objects, offer lower material costs, and print with less mess. However, the nozzle size limits detail, typically 0.2-0.4mm, visibly larger than resin pixels.
For D&D miniatures, Warhammer figures, and 28-32mm scale gaming, choose resin. The fine detail makes painting enjoyable and results professional. For dungeon tiles, building terrain, trees, rocks, and scatter scenery, choose FDM. The larger build volume and faster print speeds suit big objects where fine detail matters less.
Understanding Resolution and Detail Quality
Screen resolution (4K, 8K, 10K, 12K, 16K) indicates how many pixels the masking LCD contains. More pixels mean smaller pixel size and finer XY resolution. However, diminishing returns exist. A 16K screen on a small 7-inch printer produces 17-micron pixels, while an 8K screen on the same size produces 22-micron pixels. Both exceed what most painters can fully utilize.
More important than raw resolution is the light source quality and consistency. Even distribution across the build plate matters more than pixel count for achieving uniform prints. The printers in this guide all use quality matrix light sources that avoid the dim edges common on budget machines.
For 28mm miniatures, any printer with 22-micron XY resolution or finer produces excellent results. Only competition painters and those doing extreme close-up photography benefit from the finest resolutions. Beginners should prioritize reliability and ease of use over maximum pixel counts.
Build Volume Considerations
Build volume determines what you can print in a single piece. Small printers around 6-inch build heights handle standard miniatures comfortably. Medium printers with 8-10 inch heights accommodate larger monsters and multiple miniatures. Large printers over 10 inches handle terrain and cosplay props.
Consider your typical projects. If you mostly print individual hero figures, a small printer suffices. If you print dragons, giants, and dungeon tiles, prioritize larger build volumes. Remember that you can always cut large models into sections for assembly later, though this adds post-processing work.
The sweet spot for most tabletop gamers is 7-8 inches of build height, accommodating 75mm scale display pieces while keeping the printer compact. All resin printers in this guide hit this range except the Phrozen Mini 8K S, which sacrifices volume for precision.
Essential Features for Prop Makers
Auto-leveling eliminates the most frustrating part of 3D printing: manually adjusting bed corners while test printing. All printers in this guide except the basic budget options include auto-leveling. The Bambu Lab and Saturn 4 Ultra offer the most sophisticated implementations.
Heated resin tanks maintain optimal temperature for consistent curing. Cold resin prints poorly and fails frequently. The Saturn 4 Ultra includes heating, while other printers benefit from being in climate-controlled rooms.
Connectivity options vary. WiFi and network file transfer eliminate USB drive swapping. AI cameras enable remote monitoring and automatic failure detection. These convenience features become essential if your printer lives in a separate room or garage.
For FDM printers, direct extruders handle flexible materials better than Bowden tubes. Enclosed chambers enable high-temperature filaments like ABS and carbon fiber composites. Consider what materials you plan to use when choosing between the FDM options in this guide.
Budget Breakdown: Real Cost of 3D Printing
The printer purchase is just the beginning. For resin printing, add $150-300 for a wash and cure station, safety equipment (gloves, respirator, eye protection), and resin storage. Budget $30-50 per liter of resin, with each liter producing approximately 40-60 standard miniatures depending on hollowing settings.
FDM printing requires less auxiliary equipment. A filament dryer helps with moisture-sensitive materials at $50-100. Filament costs $20-40 per kilogram, with each kilogram producing several large terrain pieces or dozens of smaller items.
First-year operating costs often exceed the printer purchase price for active users. Budget accordingly and consider consumable costs when choosing between technologies. Resin produces finer miniatures but costs more per print and requires more equipment.
Frequently Asked Questions
What is the best 3D printer for tabletop gaming?
The ELEGOO Saturn 4 Ultra 16K is the best overall 3D printer for tabletop gaming in 2026. Its 16K resolution, smart tank heating, and AI camera monitoring make it ideal for high-detail miniatures. For budget-conscious beginners, the ANYCUBIC Photon Mono 4 offers excellent print quality at under $200. For terrain and larger props, the Bambu Lab A1 provides the best combination of build volume, speed, and reliability.
Is resin or FDM better for miniatures?
Resin is better for miniatures requiring fine detail like 28mm D&D figures and Warhammer models. Resin printers achieve 17-35 micron XY resolution with smooth surfaces ideal for painting. FDM is better for terrain pieces, dungeon tiles, and larger props where build volume and print speed matter more than surface smoothness. Many serious tabletop gamers eventually own both: resin for miniatures and FDM for terrain.
What resolution do I need for miniatures?
For 28mm scale tabletop miniatures, a printer with 22-micron XY resolution or finer produces excellent results. 4K screens on 7-inch printers provide adequate resolution for beginners. 8K, 10K, and 16K screens offer progressively finer detail that benefits competition painters and extreme close-up photography. For most hobbyists, 8K or 10K resolution hits the sweet spot of quality versus price.
How much does it cost to print a miniature?
Resin miniatures cost approximately $0.50 to $1.50 each depending on size and hollowing settings. A standard 28mm figure uses 20-30ml of resin, with resin costing $30-50 per liter. FDM miniatures cost less in material at $0.20-$0.50 each but require more post-processing time. These costs exclude electricity, equipment depreciation, and failed print waste, which add roughly 20% to material costs.
Do I need a wash and cure station for resin printing?
A wash and cure station is highly recommended for resin printing but not strictly required. You can manually wash prints in isopropyl alcohol containers and cure them in direct sunlight or under UV nail lamps. However, a dedicated station saves time, produces more consistent results, and uses less alcohol through recycling systems. Budget $150-300 for a quality wash and cure station when starting with resin printing.
Can I print Warhammer miniatures on a budget printer?
Yes, budget resin printers like the ANYCUBIC Photon Mono 4 at $189 produce Warhammer-quality miniatures. The 10K resolution captures fine details comparable to commercial resin casts. Community STL files replicate most Warhammer models with excellent accuracy. However, using these files for commercial purposes violates Games Workshop intellectual property. Print for personal use only. For best results, use 0.03mm layer height and quality resin like Siraya Tech Fast.
How long does it take to print a tabletop miniature?
A standard 28mm resin miniature takes 2-4 hours to print depending on layer height and exposure settings. 0.05mm layers print faster at 2-3 hours but show slightly more visible lines. 0.03mm layers take 3-4 hours but produce smoother surfaces ideal for competition pieces. FDM miniatures take 1-3 hours depending on nozzle size and speed settings. High-speed printers like the Saturn 4 Ultra or Bambu Lab models reduce these times significantly.
What size printer do I need for terrain pieces?
For standard dungeon tiles (2×2 inches), any printer with 100mm build height suffices. For larger building facades, trees, and rock formations, look for 200mm+ build height. The Bambu Lab A1 with its 256mm build cube handles most terrain comfortably. The Creality K1C and Ender 3 V3 SE also accommodate large terrain with their 220-250mm build volumes. Consider cutting very large terrain into modular sections that assemble after printing.
Final Thoughts
Our testing of the best 3d printers for tabletop game prop makers revealed clear winners for different use cases. The ELEGOO Saturn 4 Ultra 16K earns our Editor’s Choice for its unmatched combination of resolution, smart features, and reliability. Budget buyers should grab the ANYCUBIC Photon Mono 4 and start printing quality miniatures immediately. FDM-focused prop makers will love the Bambu Lab A1 for terrain work.
The ideal setup for serious tabletop gamers actually includes both technologies. A resin printer handles your hero miniatures and detailed monsters. An FDM printer churns out dungeon tiles and terrain features. Many experienced prop makers run exactly this dual-printer configuration.
Start with the printer matching your immediate needs and budget. All 8 printers in this guide deliver quality results when used properly. The best 3D printer is the one that fits your workspace, your wallet, and gets you printing rather than researching. Order one today and start building your custom tabletop world in 2026.